
Excel Invoice Template with Automatic Invoice Numbering
Instructions:
- Open a new Excel workbook.
- Save the workbook as “Invoice Template”.
- Enter the following data in the specified cells:
| Cell | Data |
|---|---|
| A1 | Invoice |
| A2 | Invoice Number: |
| A3 | Invoice Date: |
| A4 | Customer Name: |
| A5 | Customer Address: |
| A6 | Customer Contact: |
| A7 | Item |
| A8 | Quantity |
| A9 | Unit Price |
| A10 | Amount |
| A11 | Total: |
Automating Invoice Numbering:
- Select cell A2.
- Enter the following formula:
=CONCAT("INV-", TEXT(COUNTIF(Sheet1!$A:$A, "INV-*")+1, "000"))This formula will automatically generate a unique invoice number in the format “INV-001”, “INV-002”, etc.
Calculating Total:
- Select cell A11.
- Enter the following formula:
=SUM(A10:A10)This formula will calculate the total amount of the invoice.
Formatting the Invoice:
- Merge cells A1:B1 and center the text.
- Increase the font size of the “Invoice” title.
- Add borders around the invoice table (cells A7:A10).
- Format the “Total” cell as currency.
- Add a professional-looking invoice template design if desired.
Using the Invoice Template:
- Enter the customer information in the appropriate cells.
- Add the invoice items, quantities, and unit prices in the table.
- The invoice number and total will be automatically calculated.
- Save and email the invoice to the customer.
Notes:
- The invoice number formula assumes that the invoice data is entered in the same workbook.
- You can customize the template to include additional information or fields as needed.
- Be sure to regularly update the invoice number formula to ensure that the invoice numbers remain unique.## Excel Invoice Template With Automatic Invoice Numbering
Executive Summary
This article provides a comprehensive guide to using Excel for creating professional invoices with automatic invoice numbering. It covers the basics of invoice creation, advanced customization options, and tips for streamlining the process.
Introduction
Invoices are crucial documents for any business, serving as a record of transactions and a means to track payments. Excel, with its powerful spreadsheet capabilities, offers an efficient and flexible platform for creating invoices. This article will walk you through the steps involved in creating an Excel invoice template with automatic invoice numbering, enabling you to save time and improve your invoicing process.
FAQs
Q: Why use Excel for invoice creation?
- Flexibility and customization: Excel allows you to tailor your invoices to your specific business needs.
- Formula and calculation capabilities: Excel simplifies calculations, such as taxes and discounts.
- Data management: Excel enables you to organize and manage invoice data efficiently.
Q: What is automatic invoice numbering?
- Automatic invoice numbering assigns unique sequential numbers to each invoice, ensuring proper identification and tracking.
- It helps prevent duplication, simplifies organization, and improves invoice management.
Q: How to create an Excel invoice template with automatic invoice numbering?
- Create a new Excel workbook.
- Design your invoice layout, including header, body, and footer sections.
- Insert a formula for automatic invoice numbering using the CONCATENATE function.
- Format the invoice for professional presentation.
- Save the template for future use.
Top 5 Subtopics
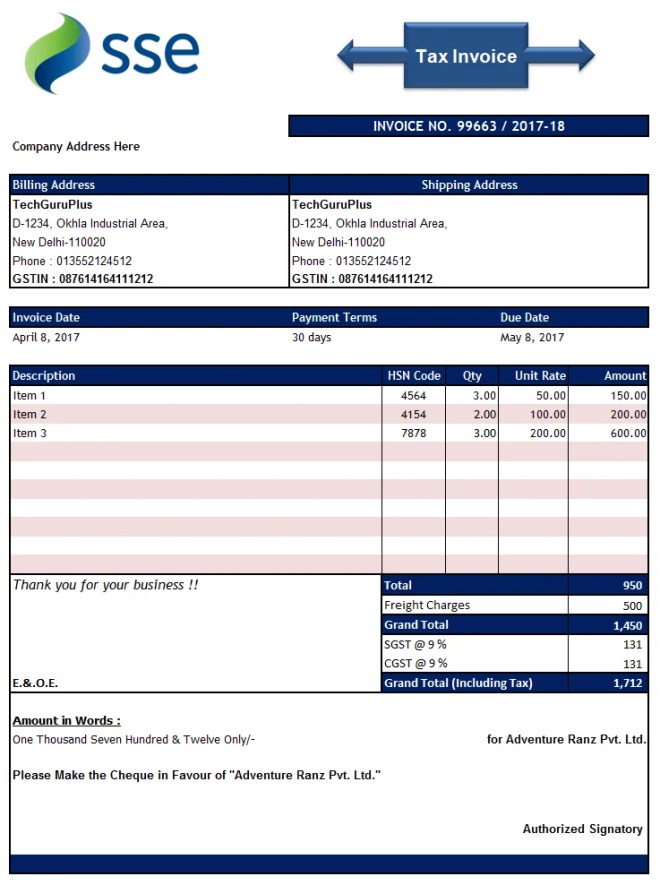
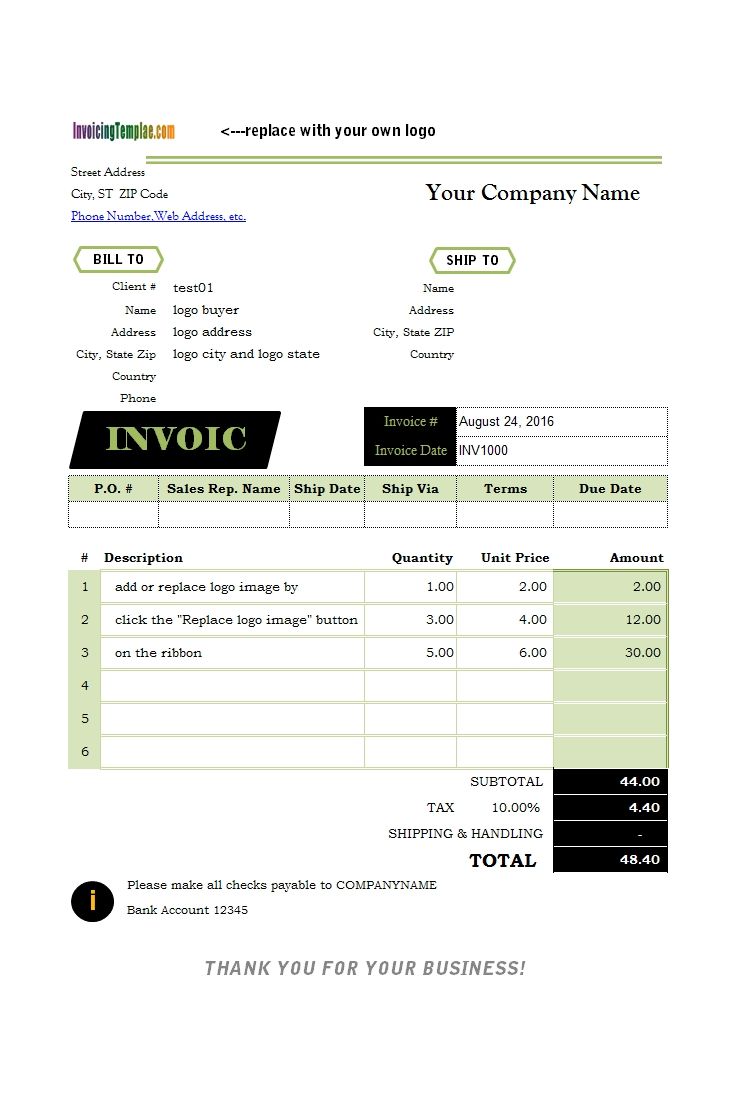
Invoice Layout
- Header: Includes business name, logo, contact information, and invoice number.
- Body: Lists the items or services provided, quantities, unit prices, and total amounts.
- Footer: Displays payment instructions, terms of sale, and any additional notes.
Invoice Customization
- Fonts and Styles: Choose appropriate fonts and styles to enhance readability and professionalism.
- Colors and Themes: Use colors and themes to match your brand identity.
- Custom Fields: Add custom fields to include specific information relevant to your business.
Automatic Invoice Numbering
- CONCATENATE Function: Combine text and numbers to create a unique invoice number.
- Text Format: Ensure the invoice number field is formatted as text to prevent formula errors.
- Cell Referencing: Use cell references to link the invoice number to other cells in the template.
Formula and Calculations
- SUMIF Function: Calculate subtotal, tax amounts, and grand total based on specific criteria.
- ROUND Function: Round numbers to the desired decimal places for precision.
- IF Function: Apply conditional formatting based on specific conditions, such as payment status.
Data Validation
- Data Validation Rules: Set rules to restrict data entry to specific formats or values.
- Drop-Down Lists: Create drop-down lists for fields with limited options, ensuring data accuracy.
- Input Validation: Validate user input to prevent errors and maintain data integrity.
Conclusion
Creating an Excel invoice template with automatic invoice numbering streamlines your invoicing process, enhances invoice accuracy, and adds a professional touch to your business communications. By following the steps outlined in this article, you can create customized invoices that meet your specific needs while saving time and improving efficiency.
Keyword Tags
Excel Invoice Template, Automatic Invoice Numbering, Invoice Layout, Invoice Customization, Formula and Calculations