
Create an Invoice Template in QuickBooks
Step 1: Set Up a New Template
- Open QuickBooks and go to the “Templates” menu.
- Select “New Template.”
- Enter a name for the template, such as “Standard Invoice.”
- Click “OK.”
Step 2: Customize the Header
- In the “Company Information” section, enter your company name, address, phone number, and email address.
- Upload your company logo by clicking the “Browse” button.
- Choose a color scheme for the header.
Step 3: Configure the Invoice Body
- In the “Invoice Details” section, specify the invoice number, date, and due date.
- Enter the customer’s name, address, and contact information.
- In the “Item Details” table, add rows for each item to be invoiced. Enter the item description, quantity, unit price, and amount.
- Apply any discounts or surcharges by clicking the “Discounts & Surcharges” button.
Step 4: Add Terms and Conditions
- In the “Terms & Conditions” section, enter any payment terms, late fees, or other conditions that apply to the invoice.
- Use the “Custom Fields” section to add additional information, such as a purchase order number or project name.
Step 5: Customize the Footer
- In the “Footer” section, add any additional information you want to include on the invoice, such as a thank-you message or contact information.
- Choose a font and font size for the footer text.
Step 6: Save and Close
- Click the “Save” button to save the template.
- Click the “Close” button to close the template window.
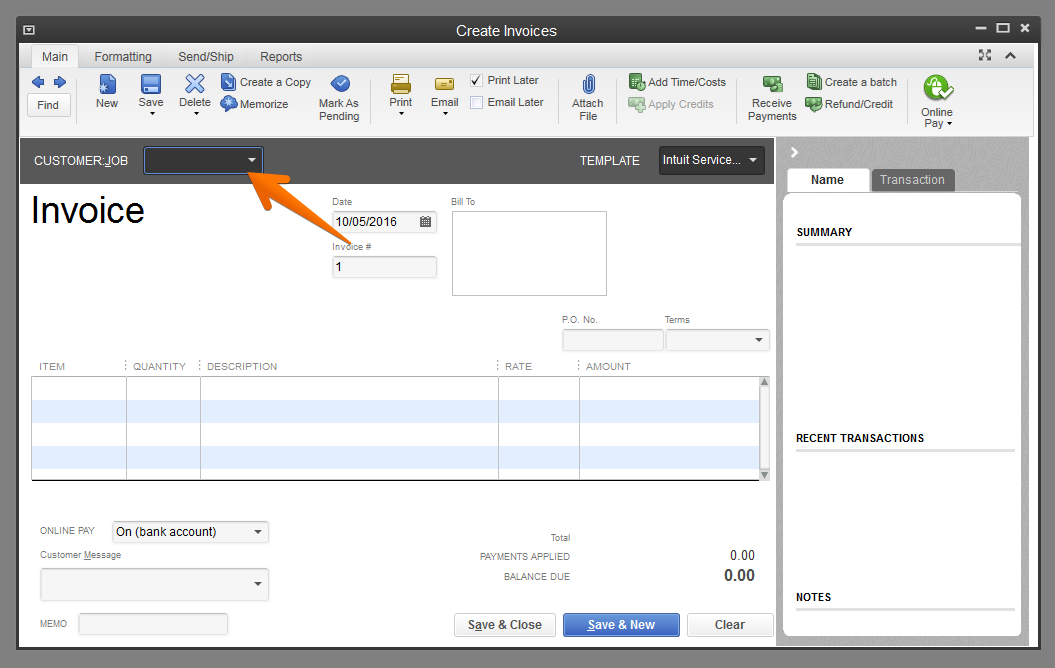
To use the template, follow these steps:
- Open QuickBooks and create a new invoice.
- Select the “Template” dropdown menu and choose the template you created.
- The invoice will be populated with the information from the template.
- Make any necessary changes and click “Save & Close.”## [Create Invoice Template In Quickbooks]
Executive Summary
Creating an invoice template in QuickBooks can streamline your invoicing process, ensuring accuracy and professionalism. This article provides comprehensive guidance on customizing and utilizing invoice templates to enhance your billing efficiency.
Introduction
An invoice template serves as a standardized framework for creating professional invoices that outline the details of goods or services provided to customers. QuickBooks offers a user-friendly platform for creating and managing invoice templates, enabling businesses to save time, reduce errors, and present their invoices in a polished manner.
FAQs
How do I create a custom invoice template in QuickBooks?
- Navigate to the “Invoice” menu in QuickBooks, select “Custom Invoice Templates,” and click “New.”
- Choose a template style, enter your business information, and customize the layout to meet your specific requirements.
Can I add my company logo and branding to the invoice template?
- Yes, you can add your company logo, header, and footer information to personalize your invoices. Simply upload the necessary images and adjust the formatting options in the template editor.
How do I apply my invoice template to invoices?
- Once you have created your custom template, select it as the default template under the “Invoice” menu > “Preferences” > “Company Preferences.” When creating new invoices, the selected template will be automatically applied.
Top 5 Subtopics
1. Invoice Customization
- Customize fields: Adjust the invoice fields to include or remove specific details, such as customer PO numbers, payment terms, and shipping information.
- Set default values: Define default values for frequently used fields, such as payment terms, tax rates, and discounts, to streamline invoice creation.
- Add notes and reminders: Include notes or reminders on the invoice to provide additional information to the customer, such as special instructions or upcoming deadlines.
2. Item Management
- Create item lists: Organize items and services offered by your business into lists, making it easy to select them when creating invoices.
- Set up pricing: Define pricing for each item, including unit prices, discounts, and tax rates.
- Manage inventory: Track inventory levels and automatically adjust item quantities on invoices based on available stock.
3. Payment Options
- Offer multiple payment methods: Include options for customers to pay via check, credit card, or online payment gateways.
- Set up payment terms: Specify payment terms, such as due dates, early payment discounts, and late payment fees.
- Enable online payments: Integrate Quickbooks with payment processors to allow customers to make secure online payments.
4. Tax Settings
- Configure tax rates: Define the applicable tax rates and automatically calculate taxes on invoices based on the customer’s location.
- Handle multiple tax jurisdictions: Support invoicing across multiple tax jurisdictions by setting up tax rates for different regions or countries.
- Generate tax reports: Utilize QuickBooks’ reporting features to generate tax reports and track tax liabilities.
5. Automation and Integration
- Automate invoice generation: Set up automatic invoice creation based on sales orders or completed projects.
- Integrate with other systems: Connect QuickBooks with other business applications, such as customer relationship management (CRM) and e-commerce platforms.
- Send invoices electronically: Enable electronic invoice delivery to reduce mailing costs and improve invoice visibility.
Conclusion
Creating an invoice template in QuickBooks empowers businesses to present professional and accurate invoices that enhance customer satisfaction and streamline billing processes. By customizing fields, managing items, offering payment options, configuring tax settings, and exploring automation options, you can optimize your invoicing system and save valuable time.
Keyword Tags
- Invoice Template
- QuickBooks
- Invoice Customization
- Item Management
- Payment Processing