
Create Invoice
Log in to your Payoneer account.

Click on the “Invoices” tab.
Click on the “Create Invoice” button.
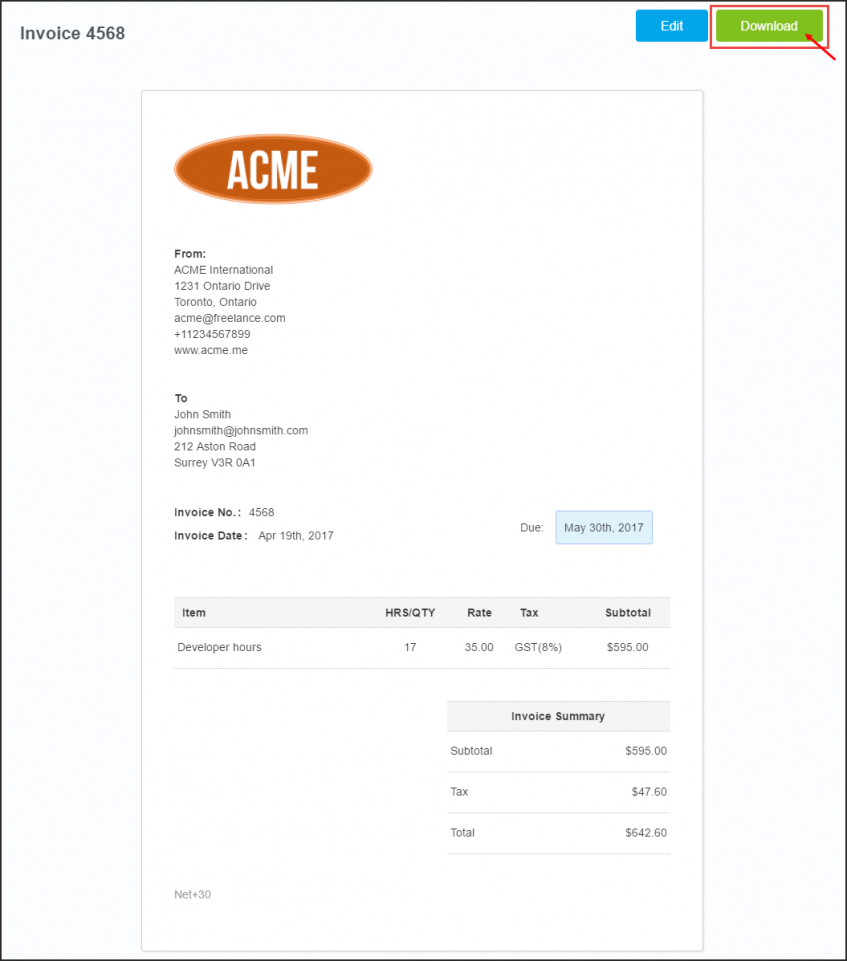
Enter the following information:
- Invoice number: This is a unique number that you will assign to the invoice.
- Invoice date: This is the date on which you are creating the invoice.
- Due date: This is the date by which the invoice is due.
- Customer name: This is the name of the customer to whom you are sending the invoice.
- Customer address: This is the address of the customer to whom you are sending the invoice.
- Customer email: This is the email address of the customer to whom you are sending the invoice.
- Customer phone number: This is the phone number of the customer to whom you are sending the invoice.
- Line items: These are the items or services that you are invoicing the customer for. For each line item, you will need to enter the following information:
- Description: This is a brief description of the item or service.
- Quantity: This is the number of units of the item or service that you are invoicing for.
- Unit price: This is the price per unit of the item or service.
- Amount: This is the total amount of the invoice for the line item.
Click on the “Save” button.
Once you have created the invoice, you can view it, print it, or email it to your customer.## [Payoneer Create Invoice]
Executive Summary
Payoneer is a global payment platform that enables businesses to send and receive payments from around the world. One of the key features of Payoneer is the ability to create invoices and send them to customers. This article will provide a detailed guide on how to use Payoneer to create invoices.
Introduction
Invoicing is an essential part of any business. It is a way to track sales, keep track of payments, and manage cash flow. Payoneer makes it easy for businesses to create professional invoices and send them to customers with just a few clicks.
FAQs
Q: How do I create an invoice in Payoneer?
A: To create an invoice in Payoneer, log in to your account and click on the “Invoices” tab. Then, click on the “Create Invoice” button.
Q: What information do I need to include on my invoice?
A: You will need to include the following information on your invoice:
- Your business name and contact information
- The customer’s name and contact information
- The date of the invoice
- A description of the goods or services provided
- The price of the goods or services
- The total amount due
Q: How do I send an invoice to a customer?
A: Once you have created an invoice, you can send it to the customer by clicking on the “Send Invoice” button. You can choose to send the invoice by email, fax, or mail.
Top 5 Subtopics
Invoice Customization
Payoneer allows you to customize your invoices to match your business branding. You can upload your logo, add a custom payment message, and change the invoice template.
- Logo: Upload your business logo to make your invoices more professional.
- Payment message: Add a custom payment message to remind customers of your payment terms.
- Invoice template: Choose from a variety of invoice templates to find one that matches your business needs.
Payment Options
Payoneer offers a variety of payment options to make it easy for customers to pay their invoices. You can accept payments by credit card, debit card, bank transfer, and e-check.
- Credit card: Accept payments from major credit cards such as Visa, MasterCard, and American Express.
- Debit card: Accept payments from debit cards such as Visa Debit and MasterCard Debit.
- Bank transfer: Allow customers to pay their invoices directly from their bank accounts.
- E-check: Accept payments from customers who do not have a credit or debit card.
Invoice Tracking
Payoneer provides real-time invoice tracking so that you can see the status of your invoices at all times. You can see when an invoice has been viewed, paid, or disputed.
- Invoice status: See the status of your invoices at a glance.
- Payment notifications: Receive email notifications when an invoice has been paid.
- Dispute resolution: Easily resolve any disputes with customers.
Recurring Invoices
Payoneer allows you to create recurring invoices for customers who need to make regular payments. You can set up recurring invoices to be sent on a monthly, quarterly, or annual basis.
- Automatic invoicing: Save time by automating your invoicing process.
- Flexible payment schedules: Set up payment schedules that work for your customers.
- Reminders: Send automatic reminders to customers before their invoices are due.
International Payments
Payoneer makes it easy to send invoices to customers in over 200 countries. You can choose to invoice in multiple currencies and accept payments in your local currency.
- Global reach: Expand your business to new markets with Payoneer’s global reach.
- Multi-currency invoicing: Invoice customers in multiple currencies to make it easier for them to pay.
- Local currency payments: Receive payments in your local currency to avoid exchange rate fees.
Conclusion
Creating invoices with Payoneer is a simple and efficient way to manage your business payments. With its customizable invoices, flexible payment options, invoice tracking, recurring invoices, and international payments, Payoneer has everything you need to get paid quickly and easily.
Keyword Tags
- Payoneer
- Invoice
- Payment
- Business
- International